Photoshop
can correct problems in color quality and tonal range created during the
original photography or during the image
scan. You can also correct problems in composition and sharpen
the overall focus of the image. It provides a comprehensive set of color
correction tools
for adjusting the color and tone of individual
images. ImageReady has a more basic set of color correction
tools, including Levels, Auto Levels, Brightness/Contrast, Hue/Saturation,
Desaturation, Invert, Variations, and the
Unsharp Mask filter.
Basic steps
Most retouching follows these general steps:
- Check the scan quality and make sure that the resolution is appropriate for how the image will be used.
- Crop the image to final size.
- Adjust the overall contrast or tonal range of the image.
- Remove any color casts.
- Adjust the color ad tone in specific parts of the image to bring out highlights, midtones, shadows, and desaturated colors.
-
Sharpen the overall focus of the image.
Although you can create publications for both paper and on-screen use, remember that a computer screen and a printed page are very different. Keep these differences in mind when you create publications for either medium - or for both media:
- Text can be small and still very legible on paper because the dots of ink on paper are much finer than the dots of light used in a monitor. Therefore, avoid small text and finely detailed graphics for on-screen use. Note that this means it is more difficult to use formatting such as multiple columns effectively on-screen.
- Computer monitors come in all sizes and you can be sure that your online readers do not all have the same monitor size. Design for the smallest monitor you expect people to have - typically a 15-inch monitor. By contrast, when you print to paper, you now what size the paper is and can design the publication accordingly. However, a page in an HTML or PDF publication can be any length.
- A computer screen is horizontal, while most printed pages are vertical. This fact fundamentally affects the format of your pages.
- A printed publication is usually read sequentially - even to flip through the publication the reader must turn from one page to the next. In an online publication, the reader can go anywhere any time, either by indicating what page to go to or by clicking on a link that goes to somewhere else, such as to another publication entirely.
-From the Official Adobe Electronic Publishing Guide, Chapter 1, "What is Electronic Publishing?"
Save
this image to your computer.
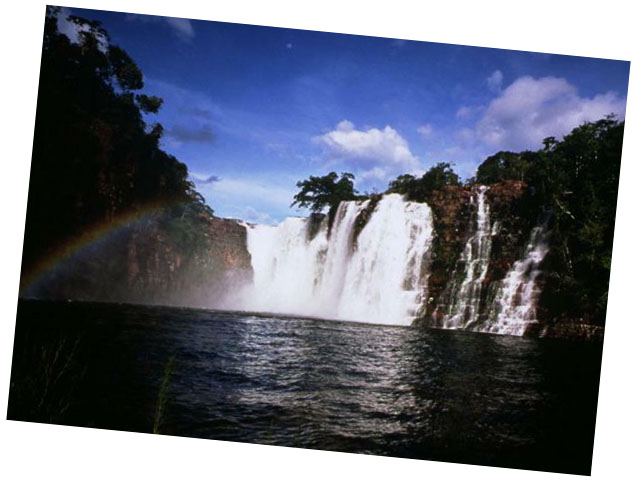
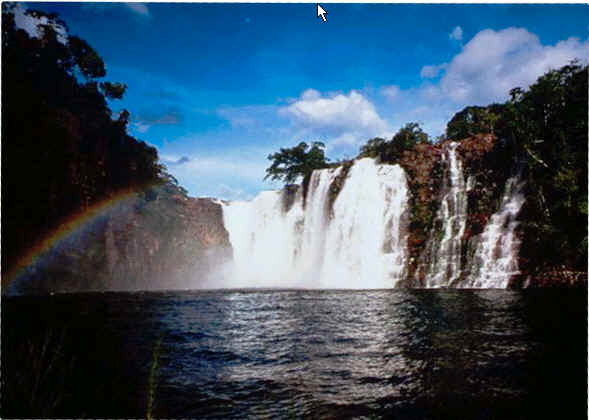
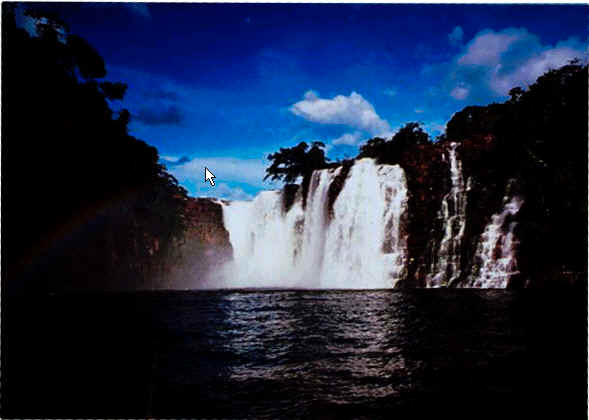
When retouching photographs you never know what
you might have to fix. In this lesson the
first thing that needs to be adjusted is
the picture, it was scanned in slightly crooked.
Go to File
> Open > WaterFalls2.jpg.
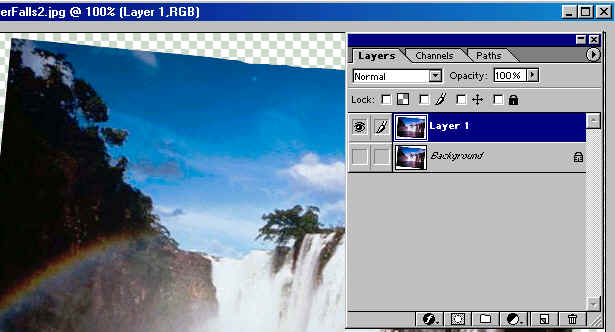
I
used the Magnetic lasso![]() tool, to select just the picture. Once selected
Right click on it and choose Layer
via Copy.
tool, to select just the picture. Once selected
Right click on it and choose Layer
via Copy.
Now
you have a layer that is just the image without the white background.
To see this better
Click on the
Eye![]() icon on the background
Copy in the layers palette.
icon on the background
Copy in the layers palette.
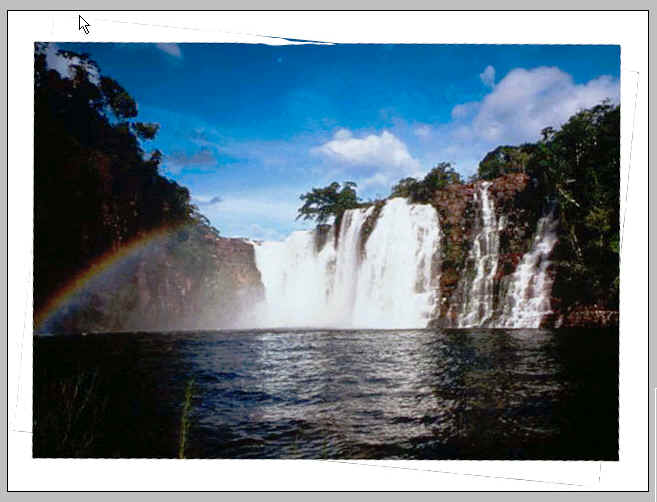
Now Go to Edit
> Transform > Rotate
- to adjust the picture so it is no longer crooked, go to the corners
of the selected rotate and you will get a curved
arrow, Move it until your picture is
straight. Don't worry if you have some color
marks left over that didn't move, we're going to
enlarge the picture next so you won't see
it. Press the Enter
key when finished with adjusting the rotation
of the image.
Next,
Go to Edit > Free
Transform (Ctrl + T ) or Transform
> Scale to enlarge the picture so it fits
on the working window. (Another way is to
use the Crop![]() tool to get
rid of the loose color fragments.)
tool to get
rid of the loose color fragments.)

All Adobe Photoshop and ImageReady color adjustment tools work essentially the same way: by mapping existing ranges of pixel values to new ranges of values. The difference between the tools is the amount of control they provide.
You can use most color adjustment tools in three ways: applying them to one or more channels, to a regular layer, or to an adjustment layer. When you make color adjustments to a channel or a regular layer, you permanently alter the pixels on that layer.
If you make adjustments to an adjustment layer in Photoshop, your changes reside only in the adjustment layer and do not alter any pixels. At the same time, you can make adjustments to multiple layers at once. The effect is as if you are viewing the visible layers through the adjustment layer above them. This lets you experiment with color and tonal adjustments without permanently altering pixels in the image. You can even limit the adjustment to specific areas of the image by painting the layer mask of the adjustment layer. When you transfer an image with an adjustment layer to ImageReady, you can view the layers but not edit them.
-From Adobe Photoshop 6.0 online Help-
Choose
Image > Adjust > Levels
and you will get a dialog box with a slider,
try it and see what
you get.
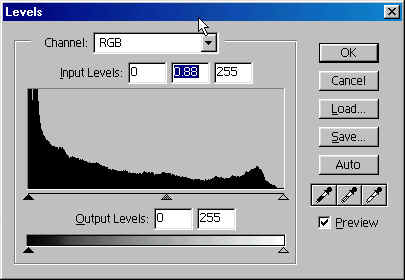
Sliding to the left is making the picture lighter, using the center triangle.
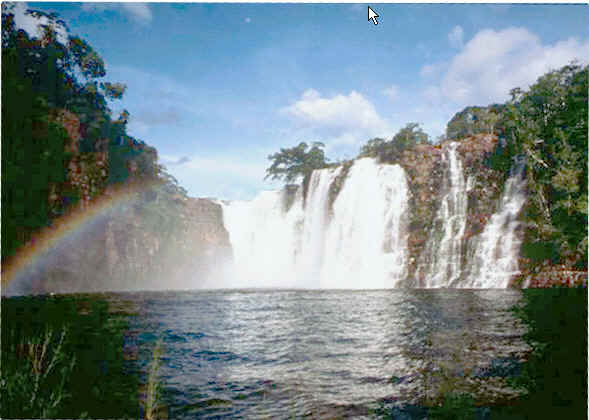
Sliding to the right-Darkens
the picture.
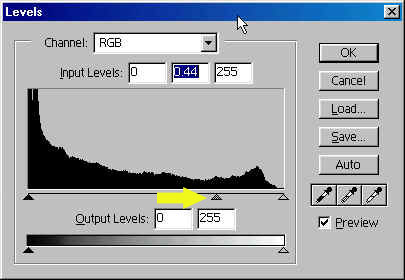
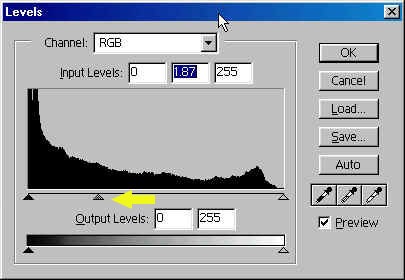
At the bottom of the Levels
dialog box is the Histogram. There are three triangles in the Histogram:
the Black triangle represents the shadows, the White triangle are the
highlights, and the midtones
or gamma is the Gray triangle.