Adobe
Photoshop uses masks to isolate and manipulate specific parts of an image.
A mask is
like a stencil. The cutout portion of the
mask can be altered, but the area surrounding the cutouts
is protected form change. You can create
a temporary mask for on-time use, or you can save
masks for repeated use.
In this lesson, we will cover the following:
- Refine a selection using a quick mask.
- Save a selection as a channel mask.
- View a mask using the Channels palette.
- Paint in a mask to modify a selection.
- Create and use a gradient mask.
In
Adobe Photoshop, you can make temporary masks, called Quick
masks, or you can create permanent
masks and store them as special grayscale
channels, called Alpha channels.
Photoshop also uses
channels to store an image's
color information and information about
spot color. Unlike layers, channels do not
print. You use the Channels palette to view and work
with alpha channels. ImageReady
does not support channels except for alpha
channels used
for PNG transparency
and weighted optimization.
-From
Adobe photoshop 6.0-
Creating
a quick mask
First
save images.
Next
Launch Photoshop , Go to
File > Open-Crash.jpg the image
that you just saved.
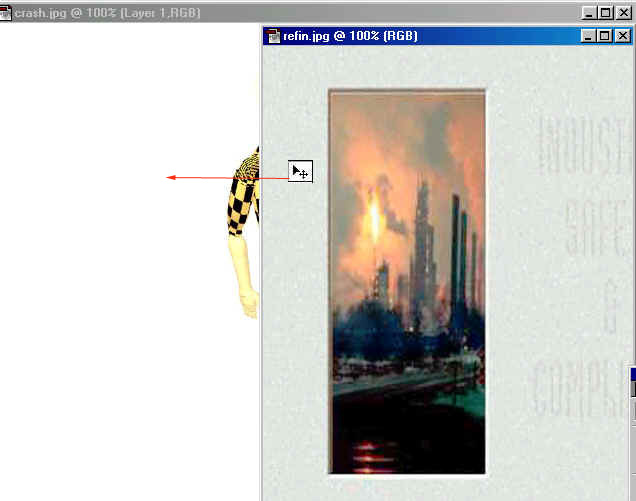
Next Open the
two image files, Fan.jpg and refin.jpg.
Minumize
the refin.jpg .
Copy
Layer the Fan image, Drag using the
MoveTool![]() the Copy layer of the Fan.jpg onto the working
image of crash.
the Copy layer of the Fan.jpg onto the working
image of crash.
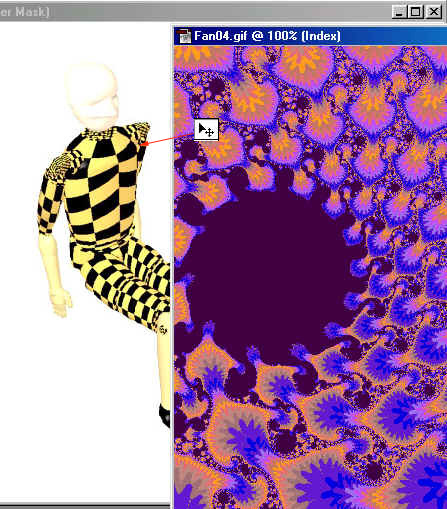
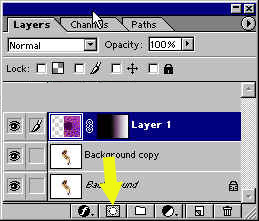
Go
to the layers palette and click
on the Mask icon ![]() at
the bottom of the palette or on the bottom
of the tool bar.
at
the bottom of the palette or on the bottom
of the tool bar.
Now choose the Gradient
tool![]() and Go to the Gradient
Option bar and select the upside down triangle(Foreground
to Background).
and Go to the Gradient
Option bar and select the upside down triangle(Foreground
to Background).

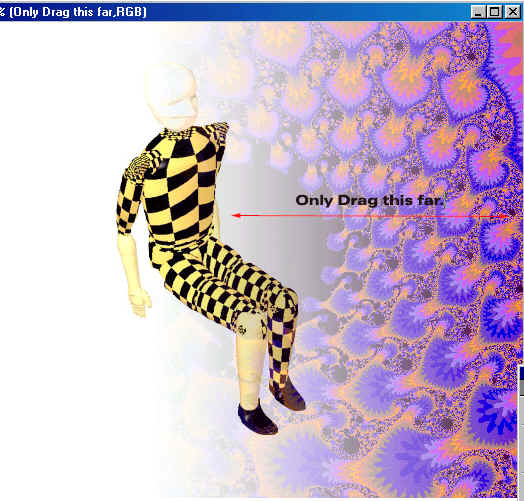
Now Drag the
Gradient from the right
side to the middle (if the fan image
is still covering to much of the crash
dumby then don't go as far to the
middle as you did the first time), this is what it should
look like.
Once you got it, Now Drag the last image
(refin) in to the working area.
Do the same process as we did on the fan
image.
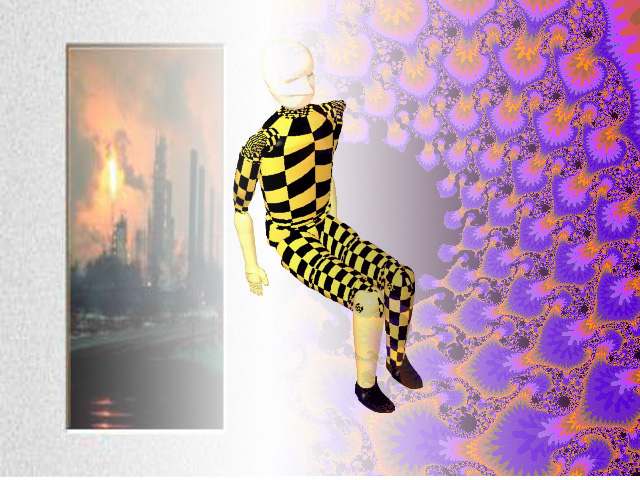
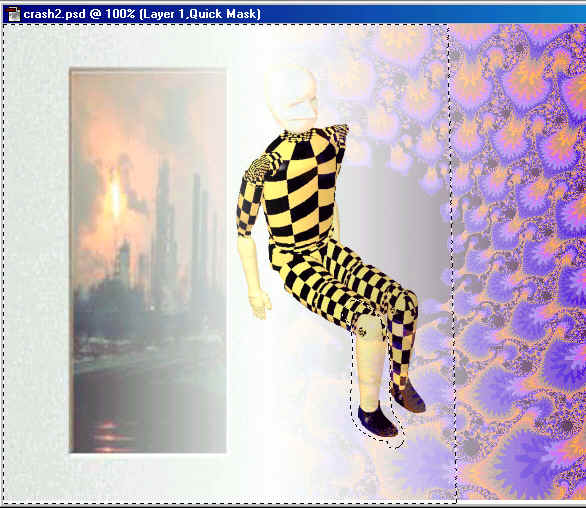
The cool thing about this project is that the crash image is on the bottom layer.
Quick masks are temporary. They disappear when you deselect. However, any selection can be saved as a mask in an alpha channel. Think of alpha channels as storage areas for information. When you save a selection as a mask, a new alpha channel is created in the channels palette. ( An image can contain up to 24 channels, including all color and alpha channels.) You can use these masks again in the same image or in a different image.
In addition to the temporary masks of Quick Mask mode, you can create more permanent masks by storing and editing selections in alpha channels. You create a new alpha channel as a mask. For example, you can create a gradient fill in a blank channel and then use it as a mask. Or you can save a selection to either a new or existing channel.
An alpha channel has these properties:
-From Adobe Photoshop online Help-
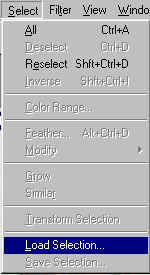
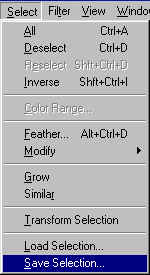
Go
to Select > Load
Select. Then
in this window click OK.

This was the last mask that we made so it's selected, now we can save
it. To do this Go back to Select
> Save Selection.
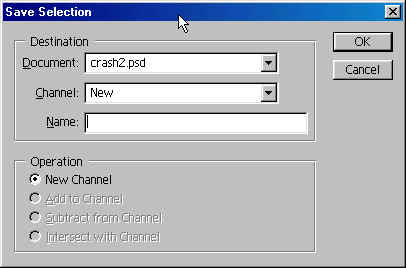
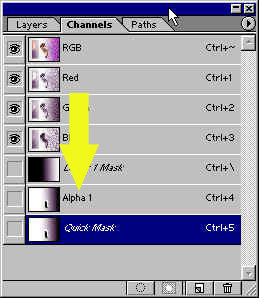
Click on OK,
and in the channels palette there is now
a new channel called alpha
1, which we
just created.
Saved
mask
Editing a Mask
You can use most painting and editing tools to edit a channel mask.
- Hide all channels except for alpha 1 and the screen is now a gray scale
- Painting with white erases the mask and increases the selected area.
- Painting with black adds to the mask and decreases the selected area.
- Painting
with Gray values adds
to or subtracts from the mask in varying opacity, in proportion
to the level of gray used to paint.