Layer Basics With Adobe Photoshop CS3
Welcome to Photoshop CS3 tutorials.
Both Adobe Photoshop and ImageReady let you isolate different parts of an Image on layers.
Each layer can then be edited as discrete artwork, allowing unlimited flexibility in composing and revising an image.Note: Only earlier versions come with ImageReady, CS3 photoshop has ImageReady options built into it there isn't any seperate program any more.
Learn how to do the following:
- Organize your artwork on layers
- Create a new layer
- View and hide layers
- Select layers
- Remove artwork on layers
- Reorder layers to change the placement of artwork in the image
- Apply modes to layers to vary the effect of artwork on the layer
- Link layers to affect them simultaneously
- Apply a gradient to a layer
- Add text and layer effects to a layer
- Save a copy of the file with the layers flattened
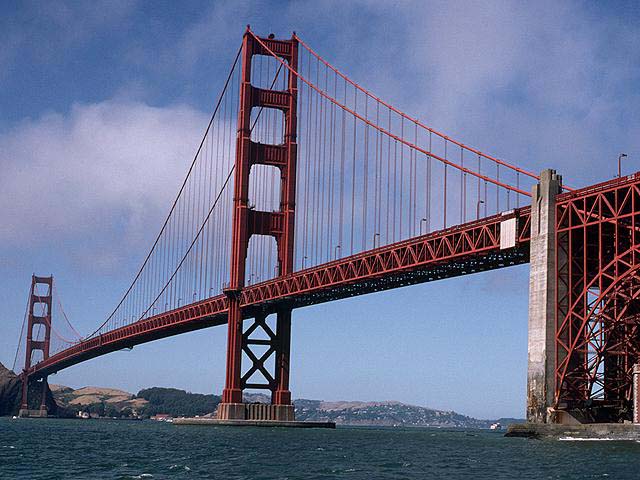
** Save this Image to your computer and name it GoldenGateBridge.**
Note: New images are created as Background when opened in Photoshop in the layers Palette.
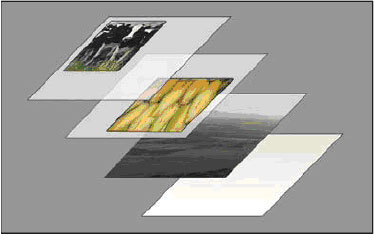
- Working in layers is like placing portions of the images on pieces of clear plastic sheets in layers, so you are able to edit parts(layer) of the image without affecting the other layers.

Save the 3 images above to your computer. Right Click > SavePictureAs for each image.
About layers
Work nondestructively
Organize layers
From Adobe Photoshop > Help |
|---|
Open Image--Go to File>Open -" GoldenGateBridge."
Now in the layers palette > Left click and Drag the background layer to the new layer button located on the bottom of the palette. Or you can right click on the background layer and create a new layer.
Double left click on the Copy Layer to rename the layer
 .
.
Now go to File>Open the 3 images that you saved to your computer, minimize LadyLib, and Lincoln for know. Keep the World image up to work on next.
Next use the Elliptical Marquee Tool
to select just the world and to get rid of the blackbackground. When using the Elliptical marquee tool
Now that you have selected just the World use Ctrl+C to make a copy of it or use the Selection Tool on image Right click and choose Layer Via Copy and Left click and Drag on the Copy of the World image using the Move Toolinto the GoldenGateBridge image.
|
|
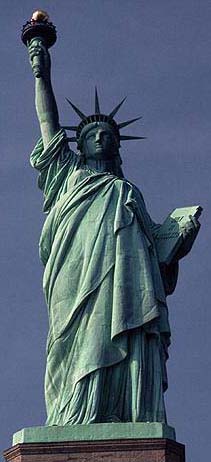
Next Maximize the LadyLiberty image to work on next.
- Use the Magic Wand tool
to select just ladyLiberty, (to do this select the Magic Wand Tool from the tool palette and click any where outside of lady Liberty in the sky area) . Use a Tolerance of 32, once you click in the sky area you'll see the outside of Lady Liberty selected.
- Next use Ctrl + Shft + I or goto Select > Inverse this will give you Lady Liberty selected only.
Use Magic Wand tool select in the Sky  Now use Inverse
Ctrl+C to Copy your selection or Right click >Layer Via Copy and Drag and Drop her using your Move tool to bring it into the GoldenGateBridge image.
At any time you can change the order of the layers by Drag and Dropping them, to better understand this use the Move Tool and Drag LadyLib over the top of the World. As you can see LadyLib is on top of the World and the background,so:
- Go to the Layers palette and left click on LadyLib and Drag it below the World layer and let go, now the World layer should be on top of the LadyLib layer. Look at your image, is the World on top of Lady lib, if it is you now know how to move layers in the layers palette.
- The other cool feature in the layers palette is the ability to hide a layer if you want to by left clicking on the eye
. When the layer is hidden this gives you the ability to work on a layer or layers and not have the image that is hidden in the way of your work.(Change layers back when your done playing by clicking on the eye icon.)
Now select the LadyLib Layer, Right Click and select > Convert to Smart Object.
Next Right Click on Lady Lib Layer again and make a copy of the layer > selecting > New Smart Object via Copy. Select the first Lady Lib Layer click on the eye to hide that layer for now.
With the copy layer of LadyLib selected > go to Edit > Free Transform(or Ctrl+T) Or Transform > Rotate or Scale, depending on where you want to locate the LadyLib. I use both Scale and Rotate to resize and angle LadyLib image .
LadyLib image is now in position and next we'll use Masking on this object, but first it needs to be rasterized from the smart Object conversion earlier in order to be able to use the Mask.
Add Mask to this layer.
Then use Masking to finish her in her new location. Use the Paint Brush tool
to make it look like LadyLib is in the water. Remember black makes the image total transparent and white you can paint back any mistakes. So you'll want to use black to make it look like the image is in the water.
Setting layer blending options
-From Adobe online Help- |
|---|
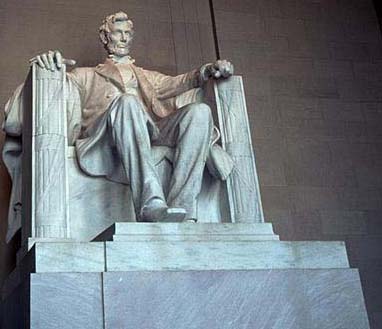
Now Maximize Lincoln's image and again we need to select Lincoln and not the background, Use the Lasso Tool, Magic Wand, or the new "Quick Selection tool. How much to select is up to you, you can see what I've selected.
 Inverse of selection (Ctrl + Shift + I Keys)
Next > Right Click > Layer via Copy

Using the Move tool
drag Lincoln onto GoldenGate image.
Move and resize Lincoln where you feel he should be located in this image.
When moving objects around it's best to make them a Smart Object so no quailty is lost in the image. I also used a Layer Style > Multiply on Lincoln.
The last but not least we need to add a blank new layer to the Layer panel at the top of the order.
Select the Gradient tool
from the Tool panel. To use the Gradient tool - Left Click and Drag your cursor to create your gradient, this should cover the whole image.
I'm using a Blending mode > Soft Light to create this effect. When you're finished you should have something like this below.